Your Guide to The Tongariro Alpine Crossing, NZ
New Zealand is renowned for its breathtaking landscapes, and the Tongariro Alpine Crossing is a testament to this.
Nestled in the heart of North Island, this iconic hike offers adventurers a chance to trek through a dramatic volcanic landscape that has been featured in films like "The Lord of the Rings."
Keep reading as I take you on a virtual journey through the Tongariro Alpine Crossing, providing insights into this epic journey…
Where is the Tongariro Alpine Crossing?
The Tongariro Alpine Crossing is located within Tongariro National Park, a UNESCO World Heritage Site, on New Zealand's North Island.
The park is about a 4-hour drive from Wellington, the capital of New Zealand, and a 4.5-hour drive from Auckland. The closest town to the crossing is National Park Village, which serves as a base for visitors. The trailhead is accessible via State Highway 47, making it relatively convenient for both domestic and international tourists.
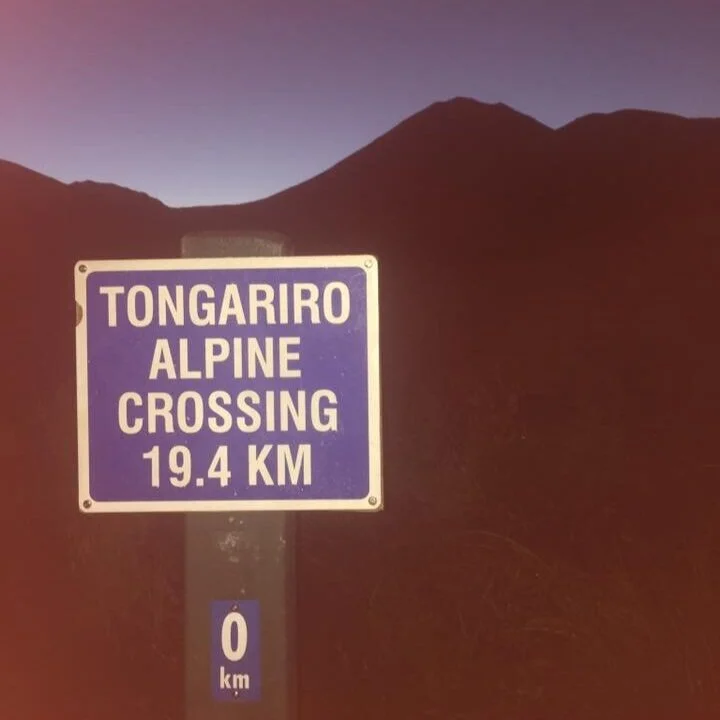
The Crossing is a linear hike, covering a distance of approximately 19.4 kilometers (12 miles) one way, starting at the Mangatepopo car park and ending at Ketetahi car park. Most hikers complete the crossing in a single day, but it can be divided into shorter sections for those who prefer a more leisurely pace.
The Details
Distance: 19.4 Kilometers
Duration: 8 Hours
Grade: Advanced
Tongariro Alpine Crossing Route Highlights
The Tongariro Alpine Crossing isn't just a challenging hike; it's also a visual feast for the senses. Along the 19.4-kilometer trail, hikers encounter a series of breathtaking natural highlights that showcase the diversity and grandeur of New Zealand's volcanic landscapes. Here are some of the standout features you can expect to encounter on your journey:
1. Mangatepopo Valley
Your adventure begins at the Mangatepopo car park, surrounded by lush meadows and the striking Mount Ngauruhoe. As you make your way along the well-marked path, you'll enjoy expansive views of the surrounding landscape and the Lower Tama Lake.
2. Soda Springs
About an hour into your hike, you'll reach Soda Springs. This is a great spot to rest and recharge. The bubbling streams and small waterfalls provide a picturesque backdrop, and you'll find a toilet block for convenience.
3. South Crater
As you ascend further, you'll reach South Crater. It's a vast, flat expanse surrounded by rugged volcanic terrain. The views from here are truly spectacular, offering a sense of accomplishment as you look back at the ground you've covered.
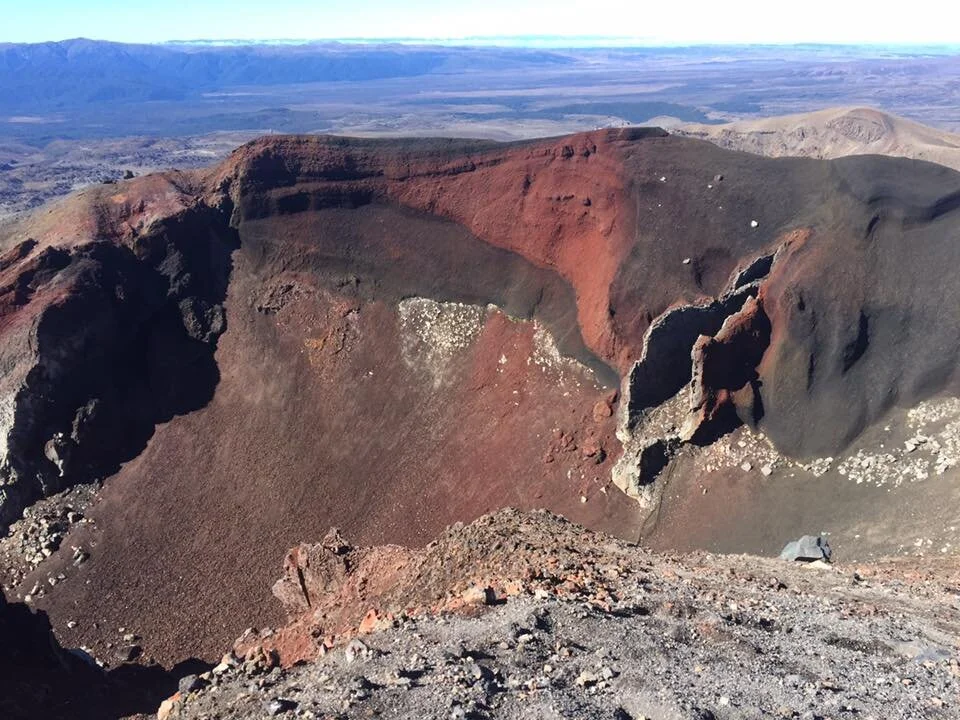
4. Red Crater
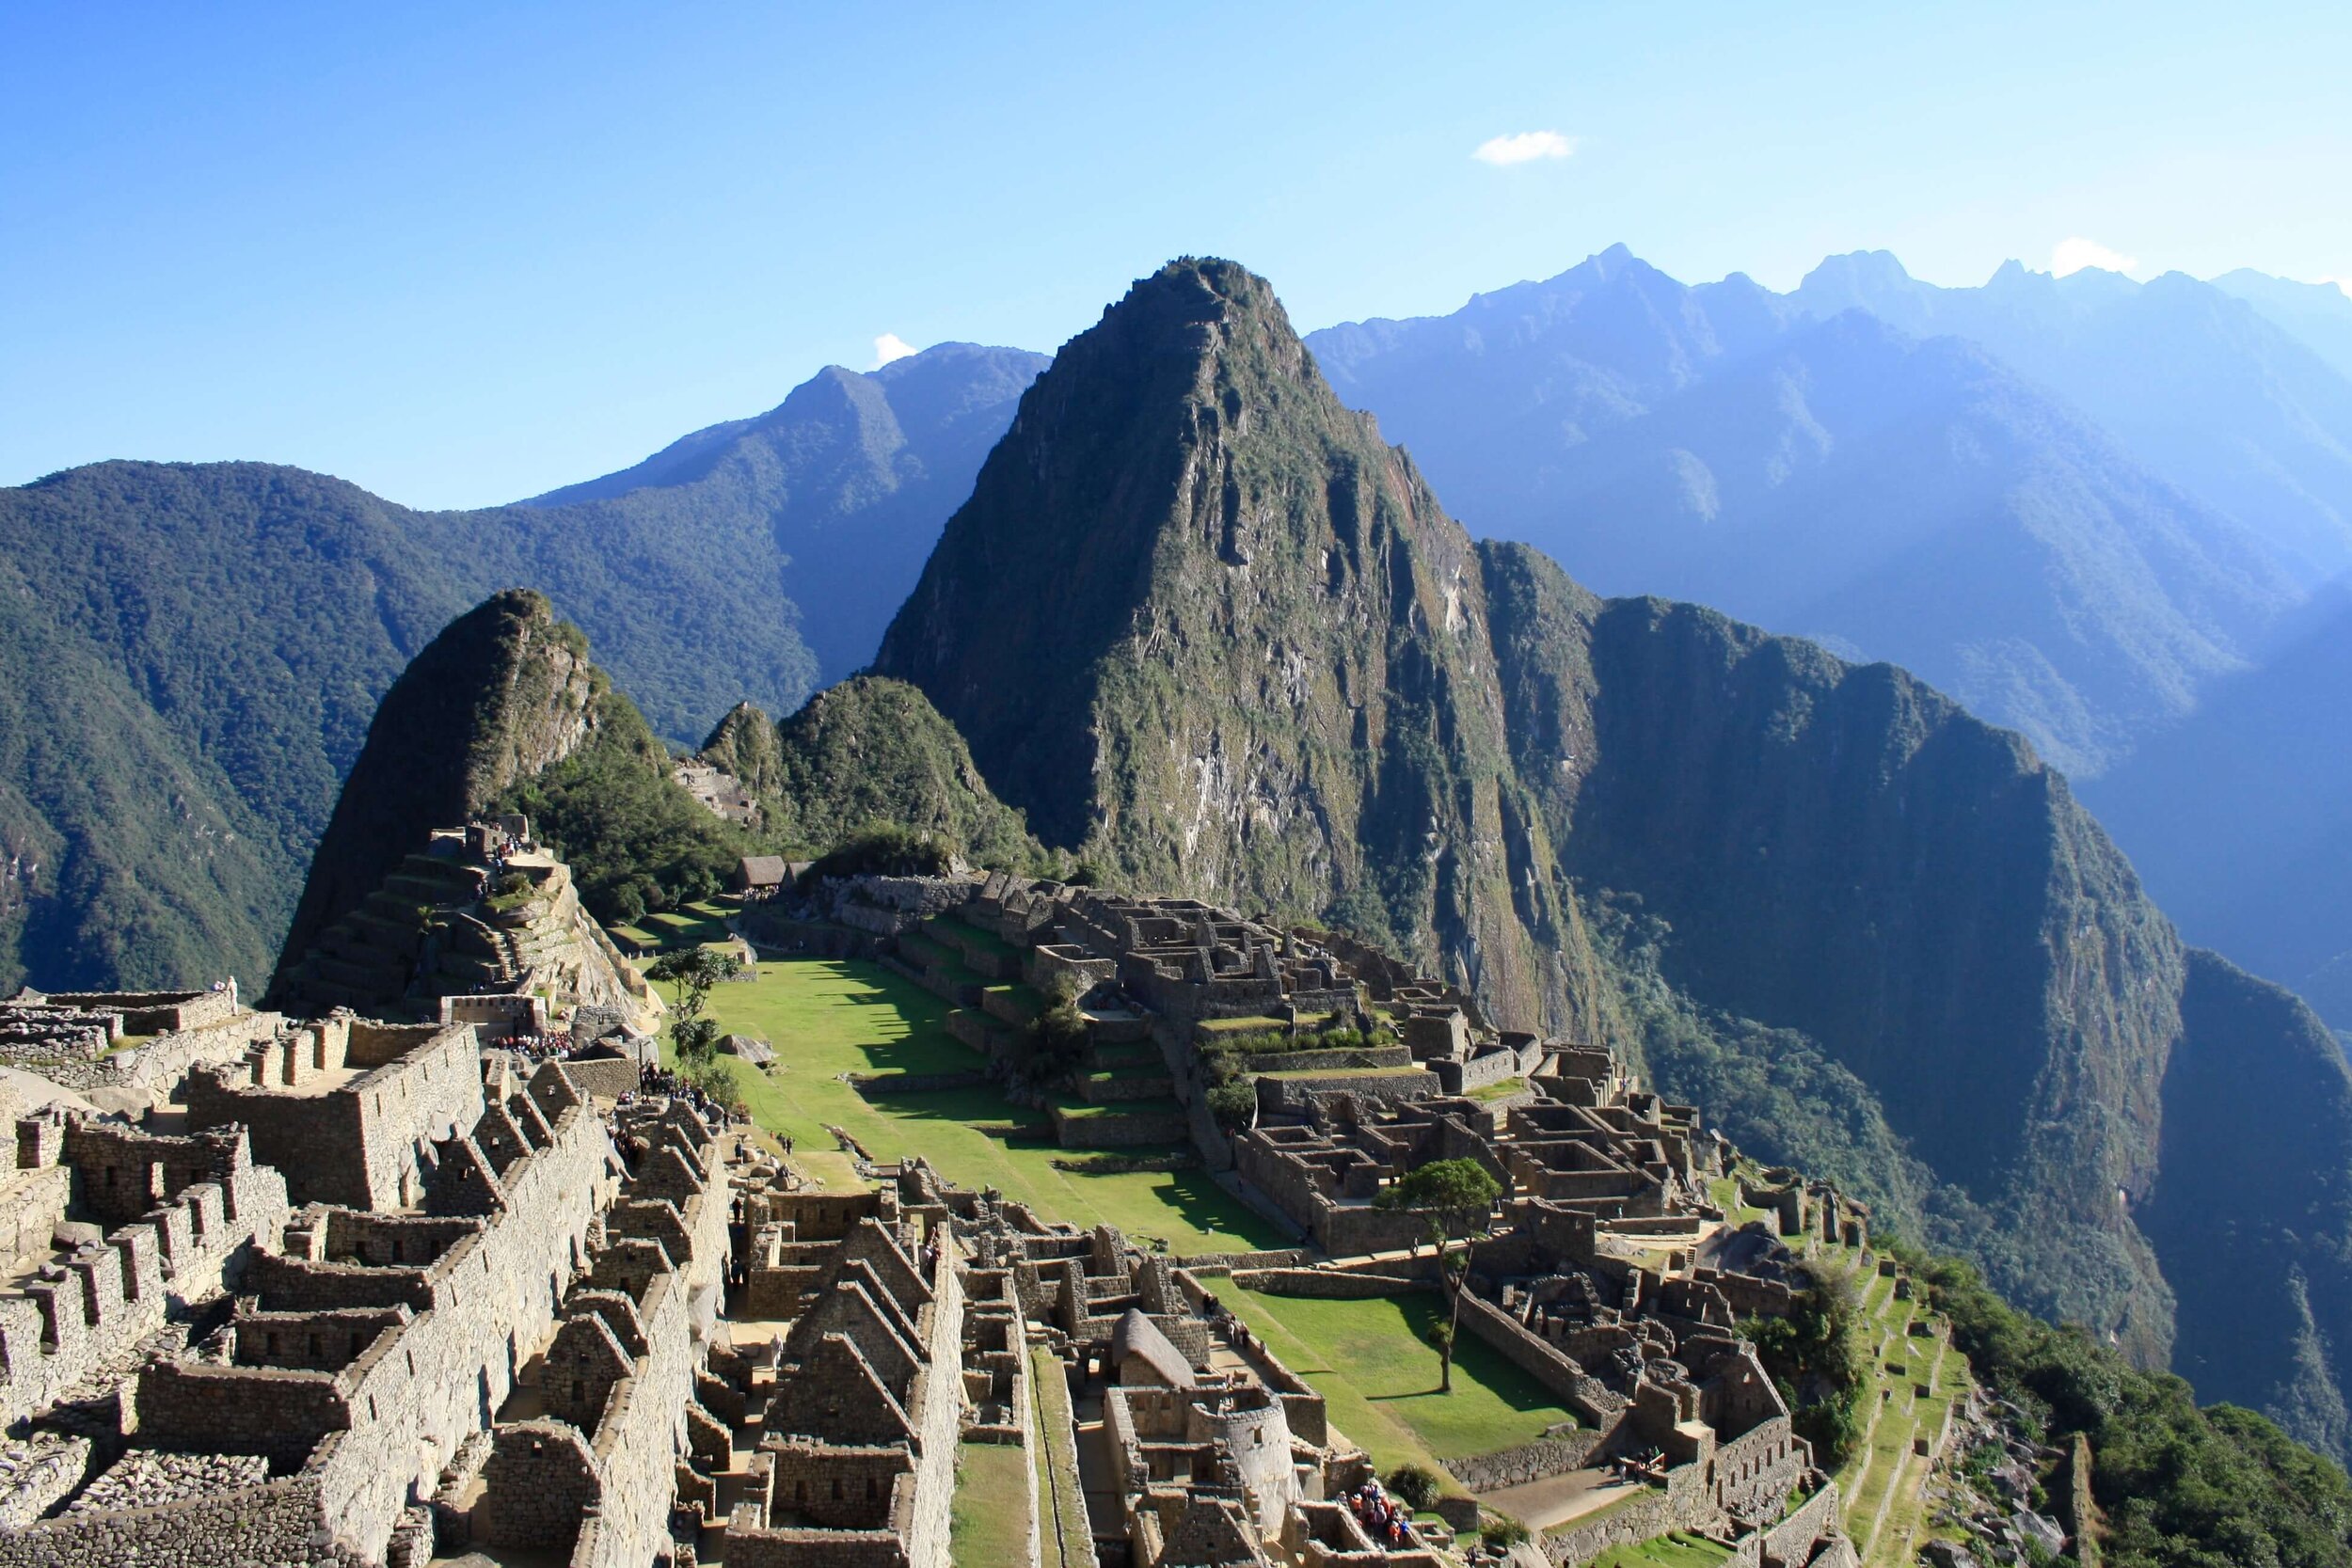
The Red Crater, situated at 1,886 meters (6,188 feet) above sea level, is one of the most iconic spots on the Tongariro Crossing. The vivid red and orange hues of the crater walls, combined with the stunning views of the Emerald Lakes below, create a surreal and otherworldly landscape.
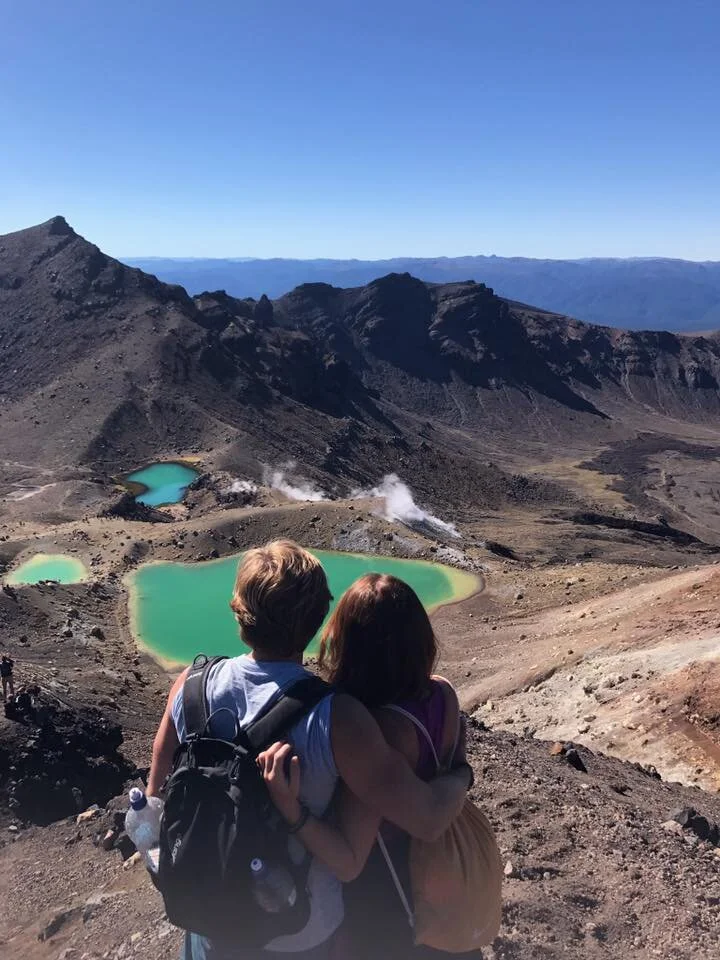
5. Emerald Lakes
Descending from the Red Crater, you'll come across the Emerald Lakes. These brilliant blue and green pools are an absolute visual treat and offer a stark contrast to the surrounding volcanic terrain. The colors are a result of mineral deposits in the water and change with the light and weather.
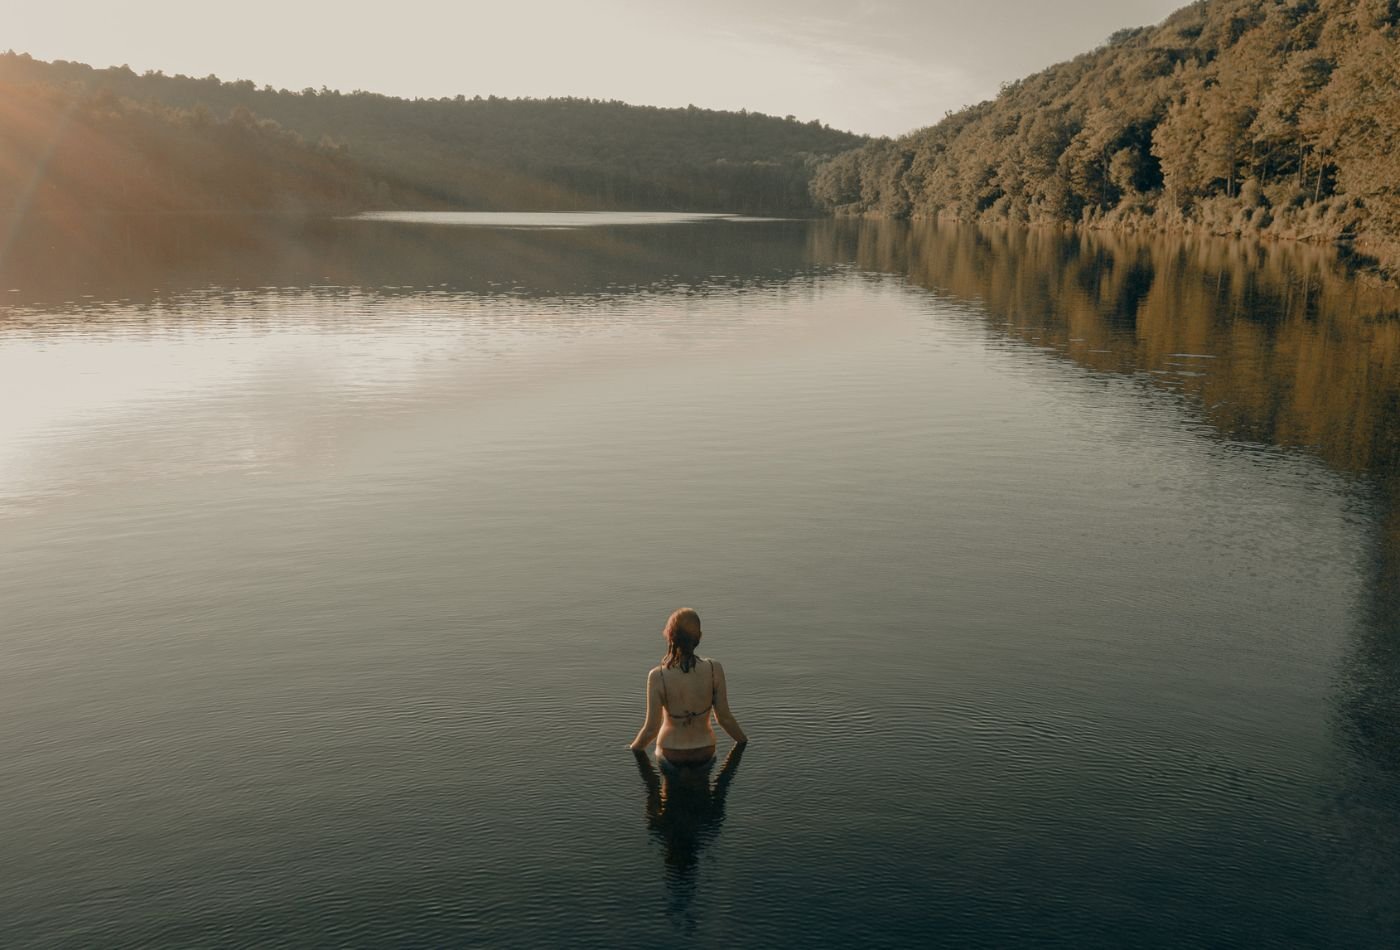
6. Blue Lake
Continuing your descent, you'll reach the Blue Lake, which is considered sacred by the local Maori people. It's one of the purest natural freshwater lakes in New Zealand, and its deep blue waters provide a serene and spiritual moment on the hike.
7. Ketetahi Hot Springs
Your journey concludes near the Ketetahi car park, but not before you pass by the Ketetahi Hot Springs. The warm geothermal waters create an inviting contrast to the cooler mountain surroundings. While swimming is prohibited to preserve the fragile environment, the sight and scent of the springs are a unique experience.
These are just some of the highlights you'll encounter on the Tongariro Alpine Crossing. The trail offers a dynamic and ever-changing landscape that keeps hikers engaged from start to finish. Each feature showcases the remarkable forces of nature that have shaped this volcanic wonderland, making the Crossing a must-visit destination for nature lovers and adventure seekers alike.
The Tongariro Alpine Crossing Map
How Difficult is the Tongariro Alpine Crossing?
The Tongariro Alpine Crossing is often described as a challenging hike, but its difficulty level largely depends on several factors, including your fitness, weather conditions, and experience. Here are some key points to consider:
1. Terrain:
The trail encompasses a diverse range of terrains, from well-marked paths to steep ascents and descents. Sections like the "Devil's Staircase" and "Red Crater" can be physically demanding, but they are interspersed with relatively flat stretches.
2. Weather:
Weather conditions on the Tongariro Crossing can be highly variable. Even in the summer months, it's essential to be prepared for rapidly changing weather, including strong winds, rain, and snow. Check the forecast before embarking on your hike, and make sure to dress in layers and pack accordingly.
3. Altitude:
The crossing reaches a peak altitude of approximately 1,886 meters (6,188 feet) at the Red Crater. Altitude can affect hikers differently, so be prepared for potential altitude-related issues like shortness of breath or headaches.
4. Fitness:
While the Tongariro Alpine Crossing doesn't require advanced mountaineering skills, a reasonable level of fitness is essential to fully enjoy the experience. If you're not an experienced hiker, consider starting with shorter hikes and progressively building your endurance.
5. Safety:
Safety is a top priority on the Tongariro Alpine Crossing. The New Zealand Department of Conservation (DOC) recommends checking the weather forecast, being aware of your physical limits, and informing someone of your plans. The DOC also provides a helpful online guide to ensure you're adequately prepared for the journey.
My Experience of The Tongariro Alpine Crossing
As soon as we had made the decision to travel to New Zealand, I knew straight away that I absolutely had to complete the Tongariro Alpine Crossing.
When we arrived in Taupo the weather was bleak and the visibility was limited. We decided to wait a couple of days for the conditions to improve – we knew the weather could change quickly and unexpectedly along the alpine crossing, and we wanted to ensure we had the best visibility possible!
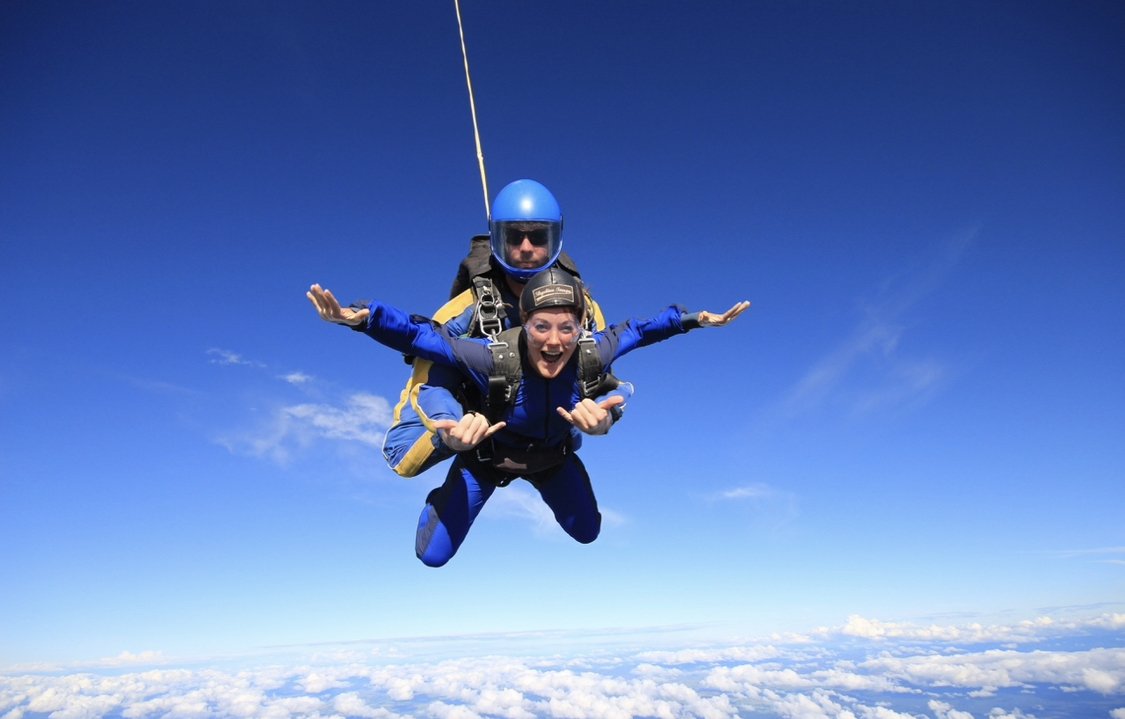
After passing the days by exploring Lake Taupo and completing a Skydive (eek) the weather cleared and it was time to trek the Tongariro Alpine Crossing!
Mangatepopo Road End to Soda Springs
The alarm clock blared at 5am, jolting us awake with a mix of nerves and sheer excitement. It was a day we had eagerly anticipated! We hopped into our trusty van and set course for the adventure of a lifetime, with Ketetahi Car Park as our destination.
Our early morning adventure began as a shuttle bus whisked us away, ensuring a seamless return to our van once we completed the trek. You can plan your shuttle bus ride by checking the timetable and booking your seats here.
As the first light of day began to break, we embarked on our journey just as the sun kissed the silhouetted mountains, transforming the landscape into something out of a sci-fi movie.
The initial stretch was a gentle, almost welcoming introduction to our day, with a well-defined path beckoning us forward.
Amid the sleepy morning chatter, we couldn't resist indulging in classic "what if the volcano erupted" chit-chat. With the awe-inspiring surroundings, it truly felt like we'd stepped onto another planet.
Our first pitstop was Soda Springs, a brief 10-minute detour from the main path, leading us to a charming, pint-sized waterfall that left a big impression.
Soda Springs to South Crater

Now, the real adventure began. The once manageable incline transformed into a formidable obstacle as we confronted the notorious Devils Staircase - a daunting 200-meter ascent that loomed before us.
As we gazed up at this seemingly insurmountable obstacle, it felt like a true test of our mettle. To be completely honest, it was every bit as challenging as it looked, if not more so.
Within just five minutes of tackling the Devil's Staircase, my calves were aflame, and my quads trembled with every step.
It became a struggle, and I found myself coming up with any excuse to pause and snap some photos, not only to capture the breathtaking scenery but also to catch my breath.
The climb was a 45-minute battle, but as we persevered, something incredible happened. The sun continued its ascent, casting a warm glow over the landscape and unveiling awe-inspiring views that left us breathless for entirely different reasons.
Our vantage point provided a panoramic view of the valley and the picturesque countryside below, with a crystal-clear sighting of Mount Ngauruhoe, which, for "Lord of the Rings" enthusiasts, is famously known as Mount Doom - it was the most archetypal volcanic mountain I'd ever laid eyes on.
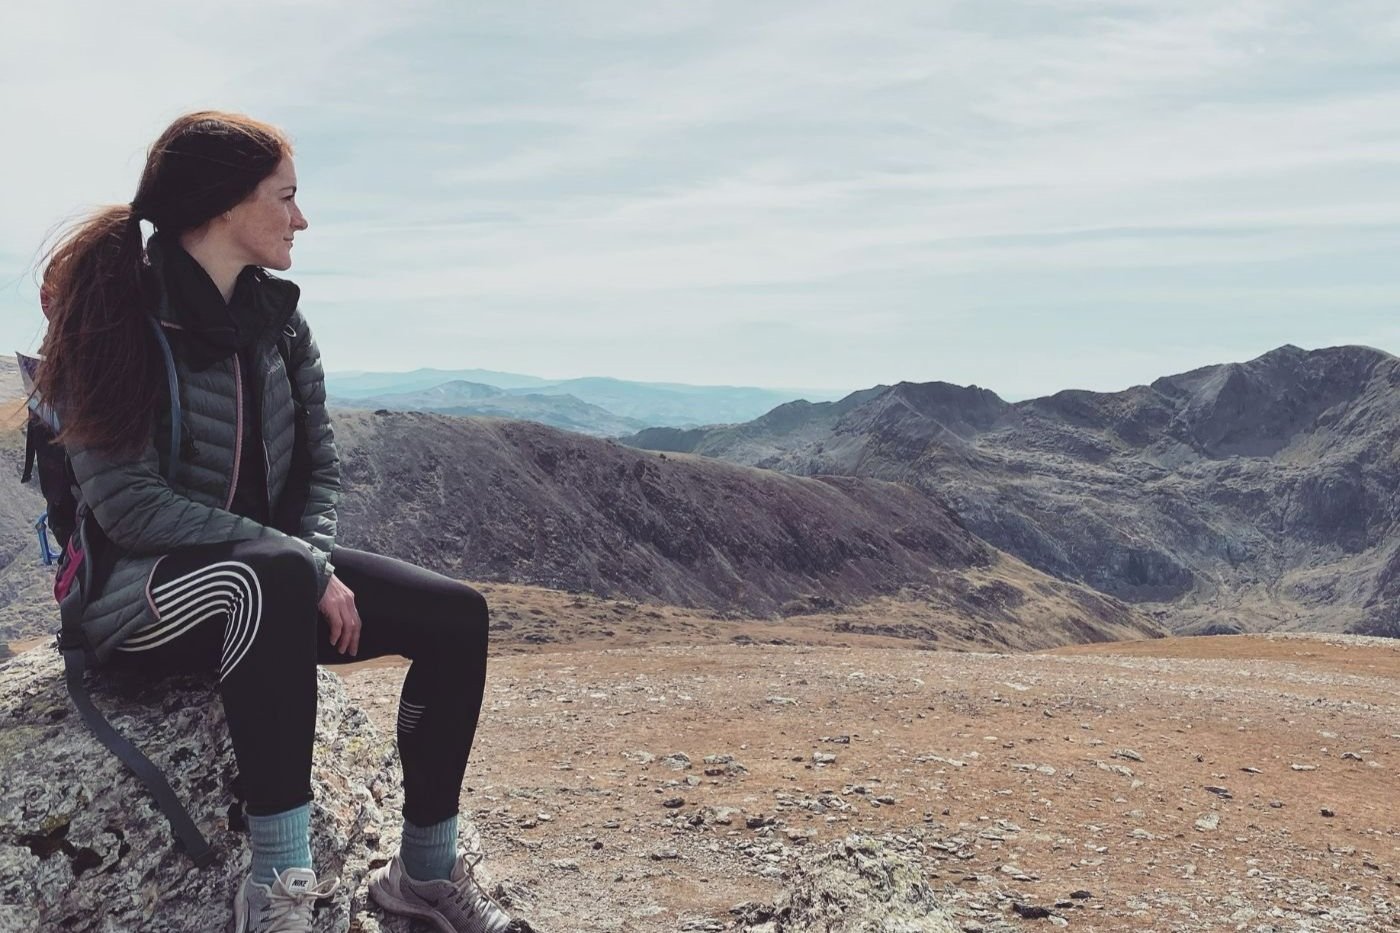
With this spectacular scene etched in our memories, we pressed on and soon found ourselves at the South Crater.
South Crater to Red Crater
Walking through the vast crater, I couldn't help but think, "We're strolling around an active volcano, just for the fun of it? We are mad!"
The reality of our surroundings hit me, and I felt a sense of awe and gratitude.
The snow-capped peak of Mount Ruapehu framed the scene, and I couldn't help but marvel at our luck to explore such an extraordinary place. There's something about mountains that simply fills my heart with joy!
By now, the clock had ticked past 9am, and with our spirits high, we decided to spice up our 19.4-kilometer trek with a little detour. Our choice? Summiting Mount Tongariro.
The path ahead was rugged, and the way wasn't always crystal clear, but we skillfully navigated the ridge, avoiding daring glances down. We diligently followed the marker poles that guided us toward the summit at 1,967 meters.
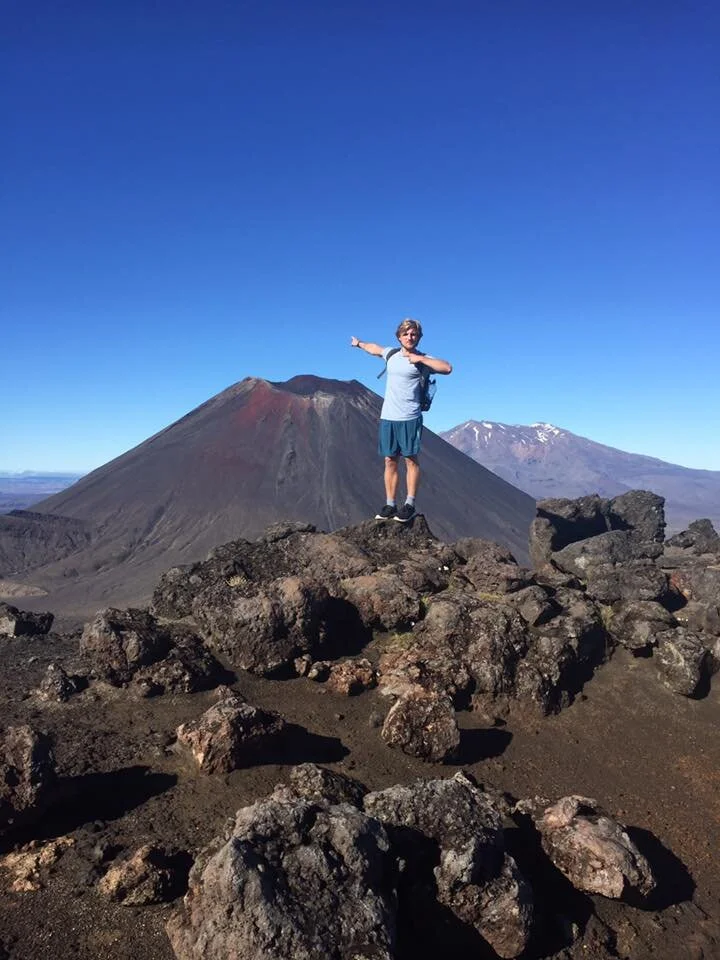
It was undoubtedly hard work, and as we pushed onwards, Jonny kept my motivation soaring with his steady stream of "Lord of the Rings" quotes (yes, "You shall not pass!" made a frequent appearance). But the reward at the top was truly worth it.
The views of Mount Doom were nothing short of incredible, set against a backdrop of clear blue skies. Jonny, in his element, was like a child in a fantasy world, half-expecting orcs to materialise at any moment.
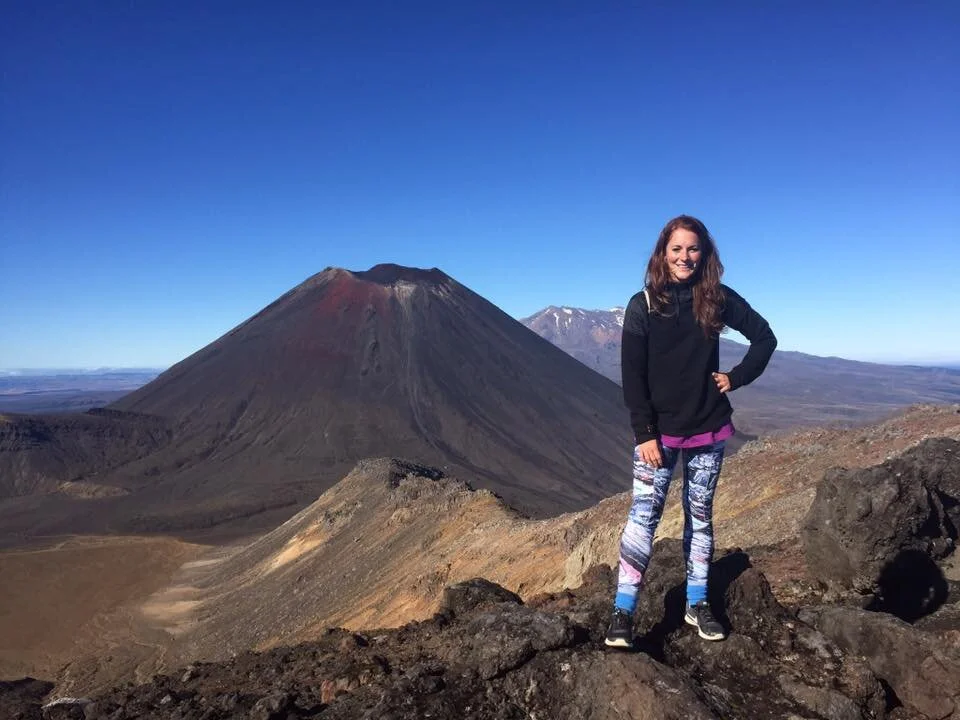
With shaking legs and a few entertaining slips along the way, we rejoined the main path and continued our journey toward the red crater, an iconic feature of the trek, as pictured above.
Red Crater to Blue Lake
As we ventured into the downhill section of our hike, I found myself in a quandary, unsure of which part of the trail I preferred.
This portion was a wild ride of its own, with a steep descent ahead of us. Loose scoria, constantly shifting underfoot, presented a real challenge. Everyone around me was slipping and sliding down the precarious slope.
My ankles rolled over more than once, and a cloud of dust enveloped us as we descended.
Thirty minutes of sheer determination and a healthy dose of positive self-talk later (Jonny had surged ahead, as he couldn't physically stop!), we finally reached the Emerald Lakes.
They lay there, their beauty belying the pungent scent of rotten eggs that filled the air due to the nearby steam vents emitting sulphurous fumes.
We made the decision to keep walking before enjoying our lunch, so we plodded on, slightly uphill to the Blue Lake to enjoy a well deserved packed lunch!
Blue Lake to Ketetahi Hut

This leg of the hike, spanning roughly an hour, was a welcome respite.
The terrain was forgiving, allowing us to chat, burst into spontaneous song, and indulge in some hearty "Lord of the Rings" quoting as we put the world to rights.
Walking is a passion of mine, and witnessing Jonny embrace trekking in the stunning landscapes of New Zealand alongside me was an absolute delight.
What a day!
We continued our journey, zig-zagging our way downhill. The vistas that unfolded, with Lake Rotoaira and Lake Taupo in the backdrop, were truly breathtaking.
It's one of those moments where photos fail to capture the full essence of the scene.
Our descent led us closer to our destination, and finally, we arrived at the Ketetahi Hut, a much-needed waypoint on our epic adventure.
Ketetahi Hut to Ketetahi Car Park

The final segment of the Alpine Crossing felt like it stretched on for an eternity.
We knew we were on the verge of reaching our destination, but the tantalising proximity yet remaining distance was a mental challenge in itself.
The previous lively conversation had dwindled into silence as we trudged through the thick forests and over bubbling streams.
My body was an orchestra of aches, and my decision to wear long, thick leggings was beginning to seem questionable as the temperature soared to a scorching 30°C.
We were a combination of exhaustion, soreness, and, well, let's admit it, less than fresh.
It felt like an eternity had passed before, at long last, the sign signaling the Ketetahi Car Park emerged into view. And what a joyous sight it was! YEY!
We had done it!! We had completed the Tongariro Alpine Crossing, with the addition of summiting Mount Tongariro! A total of 23km and 10 hours – what a day. A day I will most definitely remember forever.
Other Posts You Might Like


Discover the meaning of microadventures and explore 15 inspiring microadventure ideas to add adventure to your everyday life, no matter how busy you are!